I Love My Watson Chatbot - How Do I Make Changes To It?

Photo by Chris Lawton on Unsplash

This has also been published at Medium.com.

Note: This article was updated on April 29, to add links for a Leigh Williamson blog post that I found informative.

In an earlier blog post, IBM Watson Fueled Chatbots — For Our Health, I talk about the costs and benefits of a chatbot, and show you how a chatbot is within the reach of most organizations. I then branch out and discuss how to make updates to your chatbot, in my post called, I Love My Watson Chatbot — How Do I Update It? Now we look at doing some continuous testing, and how to do some basic version control and deploy new chatbot updates.

How Are We Doing?

In order to see how well your chatbot is performing, you need to put some automated testing of your chatbot in place. This will help you get some objective measures of chatbot accuracy and performance, and will also give you some insight into areas where your chatbot could stand to improve. Keep in mind that testing cognitive applications is fundamentally different from testing more traditional applications. Traditional applications relied on path testing, and code coverage. Due to the non-deterministic nature of cognitive applications, we end up having to use statistical models for our testing.

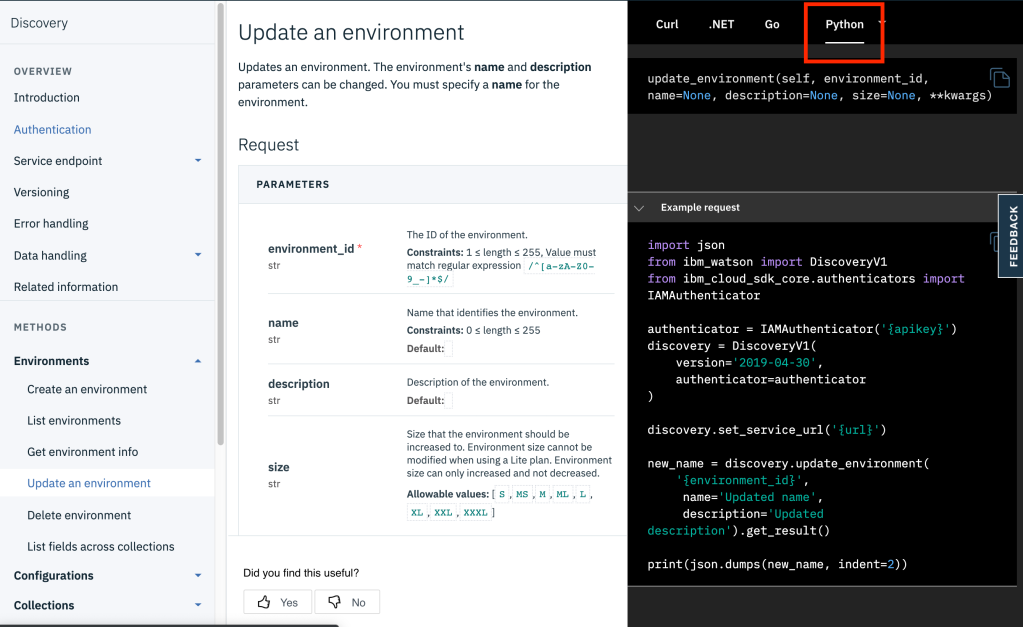
I STRONGLY suggest using the Python notebooks listed below. These can be run on your own machine, or from within Watson Studio. They are a great starting point for your automated analysis of your chatbot. Over time you can improve these notebooks and expand on some of the testing techniques in them.

  • Dialog Skill Analysis Notebook — a notebook that will do an analysis of your Dialog skill.
  • Log Analysis Workbooks — these two notebooks focus on slightly different areas, and do an analysis of your chatbot based on your logs.
  • My K-Fold Notebook — not as full-featured as the two notebooks above, but I like mine because it’s simple. For a new Python user, it also has a straightforward approach to k-fold testing that is easier to understand.

Getting the feeling that you need to know a little bit of Python? So am I. You don’t have to be a Python expert to do any of this, but you should at least understand the basics of Python, and how to use and manipulate Python notebooks. Don’t get intimidated — you don’t need to know EVERYTHING before you start — just jump in and learn things as you go.

Making Changes Without Impacting Production

Some change management scenarios are enabled by using Watson Assistant’s new versioning capability. This versioning is a bit different than some versioning that you might be used to — it’s not like a typical software development check out, check in paradigm. Instead, it is more like a baseline establishment paradigm, where a version (or baseline) is created as a snapshot of the model at some point in time. The current state of the model (which you see in the UI) is always the tip, or development version.

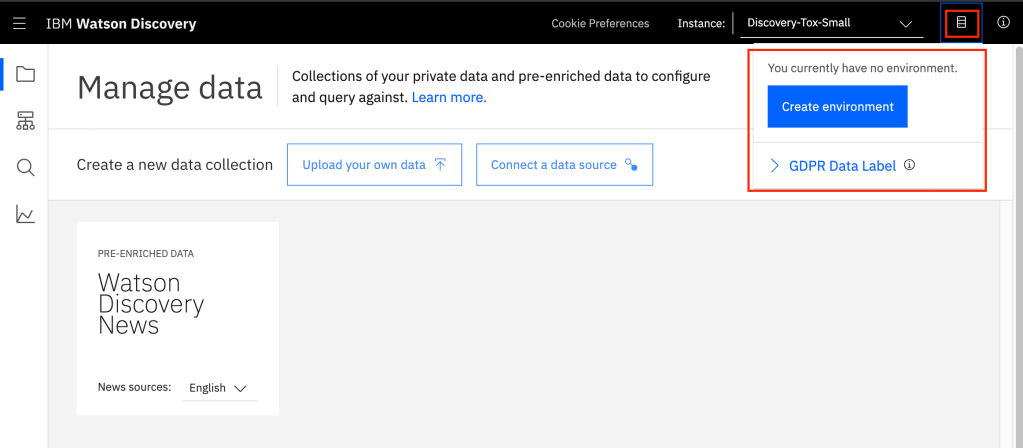
So if you go into your Watson Assistant Plus instance, and go into your skill, you can just click on “Versions” in the left-hand nav bar, and you will see the versions screen.

Versions Screen in Watson Assistant

In order to drop a new version (or baseline), just click on the “Save a new version” link in the upper right corner. You should then fill in something useful (think about naming conventions!) for the description, before pressing “Save”. We will talk more about naming conventions below, when we start to talk about some typical change management workflows.

Typical Change Management Workflows

A typical change management workflow will allow you to easily scope, contain, and then deploy changes to your chatbot. What I am proposing here is something that might not satisfy a “DevOps Purist”, since we have production and dev/test resources residing in the same service. 

Keep in mind that this approach CAN easily be modified so that instead of moving the versions around within a Watson Assistant instance, we could export the model from one Watson Assistant environment (say the test environment), and then import it into another environment (say the production environment). These environments could be located in different resource groups, with individualized access and permissions tailored for each environment/resource group.

So without further explanation, here is a high-level view of a typical lightweight change management process for your Watson Covid-19 chatbot:

  • Get suggested changes for the next cycle. Save these in some agreed upon format/tool with changes for your Covid-19 bot.
  • Agree on changes and scope of changes for the next cycle. For those of you who are familiar with Agile development principles, think of this as sprint planning….
  • Apply these changes in the tip (development) version of your Covid-19 bot
  • Test development Covid-19 bot version — validate your changes — make final revisions
  • Run automated quality tests against development bot version (yes, I wasn’t kidding about automated tests earlier, do this now — and you will thank me later)
  • Create a new version in the Covid-19 bot — call it “<YYYY-MM-DD> Production”
  • Get formal sign off for promotion of new version to production.
  • Move the Assistant pointer for the production Covid-19 bot to the new version (“<YY-MM-DD> Production”)
  • Backup the Covid-19 bot, with an export of the dialog skill to JSON — store the JSON file with name “<YYYY-MM-DD>_Production.json”
  • Move the Assistant pointer for the development Covid-19 bot to the tip version
  • Go back to step 1 and do it again……

Note that I have been non-specific about tickets/issues/tools to be using. I just trust that you are using some sort of change control — no matter how simple. You want to get your stakeholders in the habit of making change requests and then APPROVING those requests — just so we avoid any “Why did you do that?” situations. You can implement this on the IBM Cloud (a free version of GitHub hosted on the IBM Cloud), where you can do real lightweight change management, or you can use your existing change management tooling and infrastructure. It’s completely up to you.

Change Management for the Advanced User

The simple change management process outlined above will work for simple deployments, and is probably robust enough for a chatbot that is not expected to be deployed on a long term basis. What about change management for more established chatbots? Or for chatbots that are part of a larger system that is currently under some more formal type of change management? What can we do in those cases?

In those cases, and for users wishing for a more robust and formal change management or DevOps infrastructure,  you will want to read A comparison of DevOps choices for IBM Watson Assistant by Leigh Williamson. Leigh is a peer of mine who has spent some time thinking about this, and more importantly, he has spent some time actually implementing these types of change management systems.

What’s Next?

So if you have been following this series of blog posts, you have deployed a longtail chatbot that answers Covid-19 questions. You have learned how to update that chatbot, and how to test and version control your changes. What’s left to do? At this point you know enough to be dangerous — it might be time to fill in some of those learning gaps. My blog posts tell you just what you need to know, but there are so many other Watson techniques and capabilities that you can use to make your end-user experience even better. Maybe you should check out some of the Watson Covid-19 specific learning resources that are out there.

Conversational Assistants and Quality with Watson Assistant – Revisited

By Daniel Toczala

Originally posted on Medium on February 11, 2020 at https://medium.com/@dtoczala/conversational-assistants-and-quality-with-watson-assistant-revisited-123fb3bb9f1f.

Note: I updated the original Conversational Assistants and Quality blog post in February 2020 to add a link to a much better testing notebook that I discovered, and to do a slight rewrite of that section. This blog post is a complete update to that original post – and it restates a lot of what I highlighted in the original post. The BIG difference is the new Python testing notebook – which is located out on GitHub, as CSM-Bot-Kfold-Test.

In early February of 2020 I was informed of this great blog post and Python notebook, on How to Design the Training Data for an AI Assistant. I REALLY liked this Python notebook MUCH better than my original k-fold notebook (from August of 2019). The other nice thing is that you can discover this Python notebook in the catalog in Watson Studio, and just apply it and have it added to your Watson Studio project. The only big difference with this notebook is that you need to have your testing data in a separate CSV file – it doesn’t break up “folds” based on your training data. It didn’t even do folds – just straight training and testing data.

I wasn’t a big fan of that approach, I liked my basic approach of pointing at only a Watson Assistant instance, and using all of the training data in a series of k-fold tests. Nobody wants to manage this data, that data, this file, that file….. it’s an opportunity to screw things up. Most of my customers are NOT AI experts, they just want a suite of tools that they can point at their chatbot engine that will allow them to do some automated testing of their chatbot. I have also noticed that many will use ALL of their training data, and not hold back some as test data. Doing k-fold testing using all of the training data in an existing Watson Assistant instance addresses this.

However, I really liked some of the analysis that they had done of the training data, and some of the other insights that they provided. So I decided to dive in and spend a little time merging the best of both of these approaches together. First, let’s start with some basic “rules” that you should be following if you are developing a chatbot.

Getting Started with Your Conversational Assistant

Back in July of 2019, I was working with a group of like-minded people inside of IBM, and we decided to create an IBM internal chatbot that would capture a lot of the “institutional knowledge” that some of our more experienced members knew, but that didn’t seem to be captured anywhere. We wanted our newer team members to be as effective as our more seasoned members. 

We spent a week or two coming to a common vision for our chatbot.  We also mapped out a “growth path” for our chatbot, and we agreed on our roles.  I cannot begin to stress how important this is – Best Practice #1 – Know the scope and growth path for your chatbot.  We had a good roadmap for the growth of our chatbot.  We mapped out the scope for a pilot, where we wanted to be to release it to our end users, and a couple of additional capabilities that we wanted to add on once we got it deployed.

My boss graciously agreed to be our business sponsor – his role is to constantly question our work and our approach.  “Is this the most cost-effective way to do this?”, and, “Does that add any value to your chatbot?”, are a couple of the questions he constantly challenges us with.  As a technical guy, it’s important to have someone dragging us back to reality – it’s easy to get focused on the technology and lose sight of the end goal.

Our team of “developers” also got a feel for the roles we would play.  I focused on the overall view and dove deeper on technical issues, some of my co-workers served primarily as testers, some as knowledge experts (SME’s), and others as served as UI specialists, focusing on the flow of conversation.  This helped us coordinate our work, and it turned out to be quite important – Best Practice #2 – Know your roles – have technical people, developers, SME’s, architects, and end users represented.  If you don’t have people in these roles, get them.

Starting Out – Building A Work Pipeline

As we started, we came together and worked in a spreadsheet (!?!), gathering the basic questions that we anticipated our chatbot being able to answer.  We cast a pretty wide net looking for “sample” questions to get us kickstarted.  If you are doing something “new”, you’ll have to come up with these utterances yourself.  If you’re covering something that already exists, there should be logs of end user questions that you can use to jumpstart this phase of your project.

Next, we wanted to make sure that we had an orderly development environment.  Since our chatbot was strictly for internal deployment, we didn’t have to worry too much about the separation of environments, so we could use the versioning capabilities of Watson Assistant.  Since our chatbot was going to be deployed on Slack, we were able to deploy our “development” version on Slack, and also deploy our “test” and “production” versions on Slack as well.  These are all tracked on the Versions tab of the Watson Assistant Skill UI.  This gives us the ability to “promote” tested versions of our skill to different environments.  All of this allowed us to have a stable environment that we could work and test in – which leads us to Best Practice #3 – Have a solid dev/test/prod environment set up for your Conversational assistant or chatbot.

How Are We Doing? – K- Fold Testing

As we started out, we began by pulling things together and seeing how our conversational assistant was doing in real-time, using the “Try It” button in the upper right-hand corner of the Watson Assistant skills screen.  Our results were hit and miss at first, so we knew that we needed a good way to test out our assistant. 

We started out with some code from a Joe Kozhaya blog post on Training and Evaluating Machine Learning Models.  I ended up modifying it a little bit, and posting it on my Watson Landing Page GitHub repo.  We also read some good stuff from Andrew Freed (Testing Strategies for Chatbots) and from Anna Chaney (Data DevOps Rules of Engagement),  and used some of those ideas as well.

In February of 2020 I was informed of this great blog post and Python notebook, on How to Design the Training Data for an AI Assistant. I liked this Python notebook MUCH better than my old K-fold notebook, but I liked my approach better. So I went to work combining the best of both worlds into a new Python notebook. My new Python notebook does this – and provides some great insight into your chatbot. Go and find it on GitHub, where it is stored as CSM-Bot-Kfold-Test.

This highlights our next best practice – Best Practice #4 – Automate Your AI Testing Strategy.

Using Feedback

As we let our automated training process take hold, we noted that our results were not what we had hoped, and that updating things was difficult.  We also learned that taking time each week to review our Watson Assistant logs was time well spent. 

It was quite difficult to add new scope to our conversation agent, so we looked at our intents and entities again.  After some in-depth discussions, we decided to try a slightly different focus on what we considered intents.  It allowed us to make better use of the entities that we detected, and it gave us the ability to construct a more easily maintained dialog tree.  We needed to change the way that we were thinking about intents and entities.

All of this brings us to our next piece of wisdom – Best Practice #5 – Be Open-Minded About Your Intents and Entities.  All too often I see teams fall into one of either two traps. 

  • Trap 1 – they try to tailor their intents to the answers that they want to give.  If you find yourself with intents like, “how_to_change_password” and “how_to_change_username”, then you might be describing answers, and not necessarily describing intents. 
  • Trap 2 – teams try to have very focused intents.  This leads in an explosion of intents, and a subsequent explosion of dialog nodes.  If you find yourself with intents like, “change_password_mobile”, “change_password_web”, “change_password_voice”, then you have probably fallen into this trap.

We found that by having more general intents, and then using context variables and entities to specify things with more detail, that we have been able to keep our intents relatively well managed, our dialog trees smaller and better organized, and our entire project is much easier to maintain.  So, if our intent was “find_person”, then we will use context variables and entities to determine what products and roles the person should have.  Someone asking, “How do I find the program manager for Watson Assistant?”, would return an intent of “find_person”, with entities detected for “program manager” and “Watson Assistant”.  In this way, we can add additional scope without adding intents, but only by adding some entities and one dialog node. 

Why K-Fold Isn’t Enough

One thing that we realized early on was that our k-fold results were just one aspect of the “quality” of our conversational assistant.  They helped quantify how well we were able to identify user intents, but they didn’t do a lot for our detection of entities or the overall quality of our assistant.  We found that our k-fold testing told us when we needed to provide additional training examples for our classifier, and this feedback worked well.

We also found that the “quality” of our assistant improved when we gave it some personality.  We provided some random humorous responses to intents around the origin of the assistant, or more general questions like, “How are you doing today?”.  The more of a personality that we injected into our assistant, the more authentic and “smooth” our interactions with it began to feel.  This leads us to Best Practice #6 – Inject Some Personality Into Your Assistant

Some materials from IBM will break this down into greater detail, insisting that you pay attention to tone, personality, chit-chat and proactivity.  I like to keep it simple – it’s all part of the personality that your solution has.  I usually think of a “person” that my solution is – say a 32-year old male from Detroit, who went to college at Michigan, who loves sports and muscle cars, named Bob.  Or maybe a 24-year-old recent college graduate named Cindy who grew up in a small town in Ohio, who has dreams of becoming an entrepreneur in the health care industry someday.  This helps me be consistent with the personality of my solution.

We also noticed that we often needed to rework our Dialog tree and the responses that we were specifying.  We used the Analytics tab in the skill we were developing.  On that Analytics tab, we would often review individual user conversations and see how our skill was handling user interactions.  This led us to make changes to the wording that we used, as well as to the things we were looking for (in terms of entities) and what we were storing (in terms of conversation context).  Very small changes can result in a big change in the end-user perception.  Something as simple as using contractions (like “it’s” instead of “it is”), will result in a more informal conversation style.

The Analytics tab in Watson Assistant is interesting.  It provides a wealth of information that you can download and analyze.  Our effort was small, so we didn’t automate this analysis, but many teams DO automate the collection and analysis of Watson Assistant logs.  In our case, we just spent some time each week reviewing the logs and looking for “holes” in our assistant (questions and topics that our users needed answers for that we did not address), and trends in our data.  It has helped guide our evolution of this solution.

Summary

This blog post identifies some best practices for developing a chatbot with IBM Watson Assistant – but these apply to ANY chatbot development, regardless of technology.

  • Best Practice #1 – Know the scope and growth path for your chatbot
  • Best Practice #2 – Know your roles – have technical people, developers, SME’s, architects, and end users represented
  • Best Practice #3 – Have a solid dev/test/prod environment set up for your Conversational assistant or chatbot
  • Best Practice #4 – Automate Your AI Testing Strategy
  • Best Practice #5 – Be Open Minded About Your Intents and Entities
  • Best Practice #6 – Inject Some Personality Into Your Assistant

Now that you have the benefit of some experience in the development of a conversational assistant, take some time to dig in and begin building a solution that will make your life easier and more productive.

Watson Discovery at the Size You Want

I just worked with a customer this week on an issue that they had – and the solution didn’t seem obvious, so I figured that I would share it with a larger audience.

The Issue

My customer has a couple of Watson Discovery instances in the IBM Cloud environment. These instances are supporting a cognitive application that they have acting in an expert assistant role – providing quick access to guidance and information to their associates. One instance is a Discovery instance which is supporting the production environment, the other is supporting their development and test environment. Both instances are Small sized.

They realize that they would like to save some money by using a smaller size instance for their development and test environment, where they think they only need an X-Small sized instance. They asked me for some guidance on how to do this.

The Background

This is not as simple a request as it might seem at first. The issue is that once you move into the Advanced sized instances (instead fo the free Lite instances), your Discovery instances begin to cost you money. They also can be upgraded from one size to a larger size, but they cannot be shrunk. Why? We can always expand and allocate additional resource to an instance, but we cannot guarantee that there will be no loss of data when shrinking instances. So we don’t shrink them.

It’s probably best to start by looking at the various sizes and plans. Looking at the Discovery page on the Cloud dashboard gives you some idea of the costs and charges, but it is not easy to read. Instead, I find that the help pages on upgrading Discovery, and Discovery pricing, are much more helpful. The table on each of these pages are informative and when they are combined, they give you the basics of what you need to know (this is accurate at the time of publishing – November 2019).

SizeLabelDocsPrice
X-SmallXS50k$500/mo
SmallS1M$1500/mo
Medium-SmallMS2M$3k/mo
MediumM4M$5k/mo
Medium-LargeML8M$10k/mo
LargeL16M$15k/mo
X-LargeXL32M$20k/mo
XX-LargeXXL64M$35k/mo
XXX-LargeXXXL100M$45k/mo

One other IMPORTANT difference between the plans is this: Each plan gives you a single environment that supports up to 100 collections and free NLU enrichments. The only exception is the X-Small plan, which will only support 4 collections. Also, note that you may also pay additional for news queries and custom models.

What Needs To Be Done

In order to “downsize” one of their Discovery instances from Small to X-Small, the customer will need to migrate the data themselves. What makes this difficult is that they will only have 4 collections available to them in the X-Small instance, instead of the 100 that were available in their Small instance. So they need to take these steps:

  • Create a new Discovery instance, with a size of X-Small.
  • Select the 4 (or fewer) collections that will be used in the new X-Small instance.
  • Re-ingest documents into the 4 new collections.
  • Delete the old development and test Discovery instance.

Creating a Discovery Instance of a Certain Size

The issue that my customer ran into was this: How do I create a Discovery instance of a certain size? When I look at the Discovery page on the Cloud dashboard , all I see is that I can select the Advanced plan – but no option on what size to use. So how do you do it?

It’s simple, and it’s outlined in the help docs in the section on upgrading Discovery. You first need to go in and create a new instance of the Discovery service with the Advanced plan. After you do this, the service will take some time to provision. You’ll need to wait patiently while this is done – it’s usually less than 2 minutes.

Now open your Discovery instance, by clicking on the link, and then choosing the “Launch Watson Discovery” button on the Manage page. You will now see the Discovery instance come up, and you will click on the small icon in the upper right corner of the browser to bring up a dialog that will allow you to “Create Environment”.

Hit the small icon in the upper left, and then the “Create Environment” button…

Then you will be able to select the SIZE of the Discovery instance that you want. You will see a dialog that looks similar to what is shown below:

For our X-Small option, we’ll need to click on “Development”…

See that you can choose from three different menus: Development (which shows the X-Small option), Small/Medium (which shows the Small through Medium-Large options), and Large (which shows Large through XXX-Large). Choose the size that you want, and then hit the “Set Up” button. This will create your Discovery environment, in the size that you want.

What If I Want To Increase the Size of my Discovery Instance?

In the above case, we had to do some specific actions to get a new instance created in a size that we wanted. We also learned that if we wanted to SHRINK in size, we needed to create a new instance and migrate data to the new instance.

What if I have been using Discovery for a while now, and I want to INCREASE in size? How do I do that? it’s actually pretty simple, and it’s also documented in the online help, in the section on upgrading Discovery. it just provides a link to the API, but not a lot of additional explanation. I’ll give you a bit more, so it’s a bit more clear.

If you look at the Discovery API reference, you’ll see a section on Update an Environment. This is the API call that you can use to upgrade your environment (and thus, the size of your Discovery instance). The API call is spelled out in this doc, and you can get examples for whatever language or way that you want to generate this API call by just selecting a type for the example in the black window on the right. In the example below, I chose to look at this in Python.

I wanted to see the API call example in Python, but most people will just use Curl…

Just make sure to use the “size” parameter in your API call, and make sure that you use the right code for the size that you want (the label from the table earlier in this post). That’s all there is to it.

Getting Swagger API Pages for Watson APIs

In the past couple of weeks, I have seen a few comments from my customers complaining about the lack of “sufficient” API documentation for the various Watson API’s. I used to like to point my customers to the Swagger API documentation, but I can’t seem to find it anymore. So I asked some of my fellow IBM folks if they knew where these pages were. They didn’t know, they just had some vague notion that they were no longer supported.

I miss those Swagger API pages – so I found out how to get them. The IBM development teams no longer host these pages, but you can generate them for yourself, whenever you want, but just following this short little guide.

Go Ahead – Get That Swagger

Step 1 – Figure out which API you want to generate a Swagger page for. Go to the IBM Cloud catalog, and select the service that you want to see. For the purposes of this example, I’ll go and look at the Watson Assistant service.

Step 2 – Get to the API Documentation page by clicking on the link titled View API Docs – as shown below.

Step 2a – You can skip all of this hassle by just going to the IBM Cloud API Docs page, and then selecting the specific API documentation page that you are looking for (which in our case is Watson Assistant v1). This is much quicker – and easier to bookmark and remember.

Step 3 – You are now on the Watson Assistant API (V1) page. Look for the ellipsis in the white text portion of the UI, as shown below, and click on it. Save a version of the API by selecting Download OpenAPI Definition. This will download a JSON file to your local machine.

Step 4 – Open a new browser window, and go to the web-based Swagger editor.

Step 5 – In the Swagger editor window, select File -> Import File. Then select your recently downloaded Watson API JSON file (from Step 3).

You can now look at the Swagger API version of the Watson API documentation. This allows you to see all of the API calls for the service, along with the various parameters, and the responses. It also allows you to try to use the interface in an interactive manner. Pretty nice!!

IBM Cloud Content, Charges, and Delivery for Developer Teams

Note: I updated this a day or two after the original posting, as people sent me some good links to other resources that I wanted to share.

I have been getting this question constantly for the past month, and I have to do a presentation on it for one of my customers, so I figured that it is probably a good topic to share with a wider audience.  I am going to talk about how IBM Cloud customers can organize, manage, and use the IBM Cloud to develop applications and services, which they then can deliver to their customers.

First the Basics

First we need to cover the basics.  I have discussed the basic organization of an IBM Cloud account in my earlier post, “Bluemix and Watson – Getting Started Right” (Note that the IBM Cloud used to be called “Bluemix”).  In that article, I show you the basic organization of an IBM Cloud Account, it’s Organizations, and the Spaces underneath those organizations.  Most of our customers will organize their Accounts/Organizations/Spaces along the lines shown in Figure 1.

Figure 1 – A Typical Enterprise Account Structure

Note that right now there is no support for the concept of an Enterprise Account (or a parent of multiple IBM Cloud accounts), but when that capability DOES become available, I would see it being used as shown in the diagram above.  Now let’s look at what happens when you begin a project.

Launching a Project

When launching a project, you need to determine a few different things.  The most important piece is to figure out what KIND of a project you have.  I will divide projects into 4 major categories for the purposes of this conversation, and they are:

  • Internal Projects – projects that are done by your software development teams, and provide systems/applications for your organization.  This includes internal POCs, and other “exploratory” and “innovation” work.
  • Product Projects – projects that are done by your software development teams, that provide systems/applications that you market and sell as a product.  These products/services are then exposed or delivered to your customers.
  • Hosted Projects – projects that are done by your software development teams, that provide systems/applications that you host and maintain for a single customer.  This may also include products where you host unique copies (instances) for different customers.  Think of your favorite SaaS product.
  • Turnkey Projects – projects that are done by your software development teams, that provide systems/applications that you finish development on, and then deliver to your customer.

These project types are all going to require slightly different deployment and work environments.  The setup for each of these is based on the type of project, and the way that you need to react to and handle a couple of basic limitations that you need to be aware of.

The first limitation we will call the Billing Endpoint limitation.  It’s pretty simple, the bill for your Cloud services goes to the account owner – and nobody else.  So you need to be aware of the charges to any given account, how you will handle those charges (what one entity will pay for them), and how you will pass those charges along to your internal and external customers.

The second limitation is the Resource Portability limitation.  This one is pretty simple too.  You cannot “move” or “relocate” a service from one organization/space to a different organization/space in the IBM Cloud.  In order to move something from one environment to another, you need to recreate that service in the new environment in the same way that you did in the first environment.  This forces us to be disciplined in our software development – and brings us to our next section.

Importance of DevOps Tooling

The resource portability limitation means that we need to be able to recreate any cloud resource instance in some type of automated manner, in any environment we choose.  This demands a solid change management strategy, and solid DevOps tooling that can create the services and applications in your various IBM Cloud environments.

One way to do this is to use the DevOps Toolchains that are available on the IBM Cloud.  These toolchains are easy to use.  You can customize them to use tools that are “Cloud native” on the IBM Cloud, or you can use your own tools and processes.

A healthy Cloud development and deployment environment is strongly dependent on the DevOps environment that is supporting it.  Tools, standards, and automation can help development teams follow better engineering practices, and can help you deliver projects and products more quickly.  If you’re unfamiliar with DevOps, I suggest you Google it and read some of the stuff from Gene Kim, Sanjeev Sharma, Mik Kersten or Eric Minnick.

So keep in mind that setting up a DevOps framework and some administrative automation for your Cloud should be one of the first things that you do.  Investments supporting the automation of projects will pay huge dividends, and allow your teams to easily launch, execute, and retire projects in your Cloud environment.

Handling Projects

So now that I have convinced you that you need to invest some time and effort building up your DevOps capabilities on the Cloud, let’s get back to the main question of this blog post.  “How do I organize projects and content, and handle the financial aspects for these projects?”.

Handling Internal Projects

Internal projects are organized in the same way that I discuss in my earlier post, “Bluemix and Watson – Getting Started Right“.  The account level is a subscription owned by the Enterprise, and projects are run as Organizations in the Account, and the Spaces under those organizations represent the various different environments supported by a project (like development, test, QA, staging, production, etc.).

Figure 2 – Internal Project Organization

This project is going to be developed internally, and it will be deployed internally.  So our need to separate the “billing” is only from an internal perspective.  Since we can see billing at the organization and space levels (see Administering Your IBM Cloud Account – A Script to Help), it should be relatively simple to determine any chargebacks that you might want to do with your internal costs.

You’ll use the DevOps capabilities we discussed earlier to quickly establish the automation of continuous integration/continuous delivery (CI/CD) capabilities.  Teams can do development and can set up pipelines to deliver their project to staging environments, where operations teams can test the deployment and deliver to production environments.  This environment is straightforward and simple because we don’t need to worry about billing issues, and we don’t need to worry about visibility or ownership issues.  Things get more interesting with our other project types.

Handling Product Projects and Hosted Projects

Product and Hosted projects are organized in the same way, even though they are slightly different types of situations.  In these cases I recommend the use of a second IBM Cloud account.  The established Enterprise account that is already established (as described in the section on Internal Projects), should continue to be used for the development of this project.  This project is going to be developed internally, and we will track costs internally.  So our need to separate the “billing” from an internal perspective.  Since we can see billing at the organization and space levels, it should be relatively simple to determine any chargebacks that you need to do for this project.

Figure 3 – Hosted Project and Product Project Organization

You will still have development and test spaces for your project, but you will NOT have production, pre-production or staging areas.  You will use your DevOps capabilities to deliver your project to a different account/organization/space.

In the case of a product that you are hosting for general usage, you will deploy to a specific IBM Cloud account that has been created for the express purpose of hosting production versions of your product (or for the deployment of Kubernetes clusters that are running your product).  Your operations team will have access to this account, and these production environments, ensuring a separation of duties for your deployed products.

In the case of a product that you are hosting for usage by a specific customer, you will deploy to a specific IBM Cloud account that has been created for the express purpose of hosting production applications for that customer. Your operations team will have access to this account, ensuring a well defined set of duties for your hosted products.  This approach also allows you to easily collect any billing information for your customer.

Handling Turnkey Projects

Turnkey projects are organized almost exactly the same way as a hosted project, with two simple differences.  Just like a hosted project, you will need to create a new IBM Cloud account for the work being delivered.

Figure 4 – Turnkey Project Organization

The first big difference is that you are going to either have your customer own the new IBM Cloud account from it’s creation, or transfer ownership of the account to your customer.  Make sure that you are clear about who owns (and pays for) the various environments, and the timing of any account reassignment.

The second difference is that the new account may have more than just production spaces – since your customer will need development and test spaces to be able to do maintenance and further development of the application or system being delivered.

Things To Remember

Now that we’ve covered how to organize content and environments for project delivery, it’s time to remind you about some of key details that you will need to remember to make sure that your IBM Cloud development efforts go as smoothly as possible.

  • Make sure that you have a solid DevOps strategy.  This is key to being able to deliver project assets to specific environments.
  • Make sure that you have solid naming conventions and Administrative procedures.  These should be automated as much as possible (just like your DevOps support for development).  For some guidance on setting up roles and DevOps pipelines, check out some of these best practices for organizing users, teams and applications.
  • Know how you will set up your project – since this will have an impact on the contracts and costing that you have for your IBM Cloud hosted project.


Administering Your IBM Cloud Account – A script to help

Note: This post has been edited and updated multiple times, and the most recent and accurate copy of this post can be found on the IBM developerWorks website, in a blog post titled, Administering Your IBM Cloud Account – A script to help.

As many of you know, if I have to do something more than two or three times, I tend to put in some effort to script it.  I know a lot of what I can do on the command line with the IBM Cloud, but I don’t always remember the exact syntax for all of those bx command line commands.  I also like to have something that I can call from the command line, so I can just script up common administrative scenarios.

Other Options

There are some options which already exist out there.  I wasn’t aware of some of them, and none of them allow for scripting access.  One of the best that I have seen is the interactive application discussed in the blog post on Real-Time Billing Insights From Your IBM Cloud Account, written by Maria Borbones Garcia.  Her Billing Insights app is already deployed out on Bluemix.  It’s nice –  suggest you go and try it out.  She also points you to her mybilling project on GitHub, which means that you can download and deploy this app for yourself (and even contribute to the project).  Another project that I have seen is the My Console project, which will show a different view of your IBM Cloud account.

Why Create a Script?

This all came home to me this past week as I began to administer a series of accounts associated with a Beta effort at IBM (which I’ll probably expand upon once the closed beta is complete).  I have 20 different IBM Cloud accounts, and I need to manage the billing, users, and policies for each of these accounts.  I can do it all from the console, but that can take time, and I can make mistakes.  The other thing that I thought of was that I often get questions from our customers about, “How do I track what my users are using, and what our current bill is?”.  So that led me to begin writing up a Python script that would allow you to quickly and easily do these types of things.

So I began to develop the IBM_Cloud_Admin tool, which you can see the code for in its GitHub repository.  Go ahead and download a copy of it from GitHub.  This is a simple Python script, and it just executes a bunch of IBM Cloud CLI commands for you.  If you go through a session and then look at your logfile, you can see all the specific command line commands issued, and see the resulting output from those commands.  This allows you to do things in this tool, and then quickly look in the log file and strip out the commands that YOU need for your own scripts.

How To Use The Script

To run the script, you can just type in:

python IBM_Cloud_Admin.py -t apiKey.json

The script has a few different modes it can run in.

  • If you use the -t flag, it will use an API Key file, which you can get from your IBM Cloud account, to log into the IBM Cloud.  This is the way that I like to use it.
  • If you don’t use the -t flag, you’ll need to supply a username and password for your IBM Cloud account using the -u and -p flags.
  • If you use the -b flag (for billing information), then you will run in batch mode.  This will get billing information for the account being logged into, and then quit.  You can use this mode in a script, since it does not require any user input.
  • If you don’t use the -b flag (for billing information), then you will run in interactive mode.  This will display menus on the command line that you can choose from.

The Output Files

There are a number of output files from this tool.  There is the IBM_Cloud_Admin.output.log file, which contains a log of your session and will show you the IBM Cloud command line commands issued by the tool, and the responses returned.  This is a good way to get familiar with the IBM Cloud command line commands, so you can use them in custom scripts for your own use. 

You may also see files with names like, MyProj_billing _summary.csv and MyProj_billing _by_org.json.  These are billing reports that you generated from the tool.  Here is a list of the reports, and what they contain.

  • MyProj_billing _summary.csv – this CSV file contains billing summary data for your account for the current month.
  • MyProj_billing _summary.json – this JSON file contains billing summary data for your account for the current month.  It shows the raw JSON output from the IBM Cloud CLI.
  • MyProj_billing _by_org.csv – this CSV file contains billing details data for your account, split out by org and space, for the current month.
  • MyProj_billing _by_org.json – this JSON file contains billing details data for your account, split out by org and space, for the current month.  It shows the raw JSON output from the IBM Cloud CLI.
  • MyProj_annual_billing _summary.csv – this CSV file contains billing summary data for your account for the past year.
  • MyProj_annual_billing _summary.json – this JSON file contains billing summary data for your account for the past year.  It shows the raw JSON output from the IBM Cloud CLI.
  • MyProj_annual_billing _by_org.csv – this CSV file contains billing details data for your account, split out by org and space, for the past year.
  • MyProj_annual_billing _by_org.json – this JSON file contains billing details data for your account, split out by org and space, for the past year.  It shows the raw JSON output from the IBM Cloud CLI.

Use the JSON output files as inputs to further processing that you might want to do of your IBM Cloud usage data.  The CSV files can be used as inputs to spreadsheets and pivot tables that you can build that will show you details on usage from an account perspective, as well as from an organization and space perspective.

Getting Your Api Key File

I’ve mentioned the API key file a couple of times here.  If you are not familiar with what an API Key file is, then you’ll want to read this section.  An API Key is a small text file which contains some JSON based information, which when used properly with the IBM Cloud command line tool, will allow anyone to log into the IBM Cloud environment as a particular user, without having to supply a password.  The API Key file is your combined username/password.  Because of this, do NOT share API keyfiles with others, and you should rotate your API Key files periodically, just in case your keyfile has become compromised.

Getting an API Key on IBM Cloud is really easy.

  • Log into the IBM Cloud, and navigate to your account settings in the upper right hand corner of the IBM Cloud in your web browser. Select Manage > Security > Platform API Keys.
  • Click on the blue Create button.
  • In the resulting dialog, select a name for your API Key (something that will tell you which IBM Cloud account the key is associated with), give a short description, and hit the blue Create button.
  • You should now see a page indicating that your API Key has been successfully created. If not, then start over again from the beginning. If you have successfully created an API Key, download it to your machine, and store it somewhere secure.

Note: A quick note on API Keys. For security reasons, I suggest that you periodically destroy API Keys and re-create them (commonly called rotating your API keys or access tokens). Then if someone had access to your data by having one of your API keys, they will lose this access.

Other Tasks

Do you have other administrative tasks that you would like to see the tool handle?  Find a bug?  Want to help improve the tool by building a nice interface for it?  Just contact me through the GitHub repository, join the project, and add issues for problems, bugs, and enhancement requests.

A Final Thought

This script is a quick hacked together Python script – nothing more and nothing less.  The code isn’t pretty, and there are better ways to do some of the things that I have done here – but I was focused on getting something working quickly, and not on efficiency or Python coding best practices.  I would not expect anyone to base their entire IBM Cloud administration on this tool – but it’s handy to use if you need something quick, and cannot remember those IBM Cloud command line commands.

Deploying Production Cloud Applications – A Readiness Checklist

I just had a conversation today with my VP (Rob Sauerwalt – check him out on Twitter – time to do some shameless kissing up to my management team) about a recent internal communication that we both saw.  It was someone looking for a “readiness checklist” for the deployment of an application on the IBM Cloud.  Rob and I both agreed that this seems pretty simple, and we came up with a quick checklist of things to consider.

Now this list is not specific to the IBM Cloud, it’s pretty generic.  It’s just a quick checklist of things that you will want to make sure that you have considered, BEFORE you deploy that cloud based application into a production environment.  I am an Agile believer, so I would suggest that you address these checklist items in the SPIRIT of what they are trying to do, and that you should do what makes sense.  This means that each one of these areas does not need to represent some 59 page piece of documentation.  What you want to do is provide enough information so the poor guy who takes your job after you get promoted, is able to be effective and understand and maintain the application or system.

If you have suggestions about other things that should be on this list, please drop me a line and let me know.  I would love to add them to the list, and make this generic deployment readiness checklist even better.

Production Readiness Checklist

The Basics

⊗ Name and General Description of the Application – this includes the purpose of the application and the number of users that are anticipated to use the application.  Also have an idea of the types of users.  Is it for the general public?  Only for certain roles within our organization?  Is it only for your customers?  Do this in two to three paragraphs – anything more is adding complexity.

⊗ Description of Needed Software/Hardware/Cloud Resources – a list of the needed software packages, and the clou resources needed to run the application.  Do you use third party utilities or libraries?  Do you run on Cloud Foundry buildpacks?  Virtual machines?  Do you use Cloud services for database resources?  Often a high level architectural diagram is useful to help other people understand the system at a high level.  This should be done AS you build – so you can simplify things.  Are your developers using different libraries to accomplish the same thing?  Get them to standardize.  Reduce your dependencies, reduce your complexity, and you improve your software quality.

DevOps Considerations

⊗ Operating Systems and Patching Requirements – do you have specific OS requirements?  Do you require a particular framework to run properly (like .NET, Eclipse, or a particular Cloud Foundry buildpack)?  What OS versions have you tested and validated this application with – and do all of your components need to be on the same OS version?  This becomes important when fixes get deployed to containers, virtual machines get upgraded, and maintenance activities are done.

⊗ Installation and Configuration Guidelines – you should be deploying your application in some automated manner.  So your deployment and promotion scripts should be the only guide that you need…… except when they aren’t.  Take the time and DOCUMENT those scripts – explain WHAT you are doing and WHY, so your application can easily be reconfigured or deployed in different ways in the future.

⊗ Back-up, Data Retention and Data Archiving Policies – let your operations people know what data needs to be archived and retained.  How often do systems need to be backed up?  How will services be restored in the event of a crash?  Explain WHERE and HOW data needs to be retained.  Explain what your DEVELOPMENT teams need to review on a periodic basis.  This can be the biggest headache for development teams, because these are often scenarios that they have not considered.  Backup plans are not sufficient, they need to be executed at least once before you go into production – so you are sure that they are valid and that they work.

⊗ Monitoring and Systems Management – This includes runbooks – what do we need to do while the application is running?  Do we need to take the logs off of the system every day and archive them?  Or do we just let logs and error reports build up until the system crashes?  Should I monitor memory and heap usage on a daily basis?  Should I be monitoring CPU load?  Who do I notify if I see a problem, and what is a “problem”?  (CPU at 50%? CPU running at 20% with spikes to 100%?)  How will this application normally be supported?  You may not have complete information and definition of “problems” when you begin, bu define what you can and acknowledge that things will change as time goes on.

⊗ Incident Management – This details how you react to application incidents.  These could be bugs, outages, or both.  In the case of an outage, who needs to be called, and what actions should they take to collect needed data, and to get the application back up and running.  What logs are needed, what kind of data will aid in debugging issues?  Who is responsible for application uptime TODAY (get things back on track and running), and who is responsible for application uptime TOMORROW (who needs to find root cause, fix bugs, make design changes if needed, etc.).

⊗ Service Level Documentation -This is the “contract” between you and your customers.  How often will your application be down for maintenance?  If your application is down, how long before it comes back up?  Are there any billing or legal ramifications from a loss of service?  Do your customers get refunds – or cash back – when your Cloud application is unavailable?

⊗ Extra Credit – DevOps pipeline – you need to have an automated pipeline for the deployment of code changes into well defined development, test, and production environments.  You need to have a solid set of policies and procedures for the initiation and automation of these deployments.  Who has authority to deliver to test environments?  Production environments?

Software Architecture Considerations

⊗ Key Support & Maintenance Items – the team that built this thing knows where the weak spots are – share that knowledge!  Where does the team know that “tech debt” exists – and how is that impacting your application?  This information will help the teams maintaining and upgrading your application.  They will be able to do this with knowledge about how the application works, and why certain architectural choices were made.

⊗ Security Plan – Everyone is worried about the security of their applications and data on the cloud.  You need to be sensitve to this when deploying cloud based applications.  Your stakeholders and users will want to know that you have considered security, and that you are protecting their data from being exposed, stolen, or used without their knowledge/consent.

⊗ Application Design – This should include some high level description of your use case, a simple flowchart and dependencies.  Give enough detail so someone can easily get started in maintaining your application code, but not so much detail that you waste time and ultimately end up with documentation that does not match the code.

Is That Everything?

That’s not everything, but it is a good minimal list of things that you should have considered and/or documented.  Most applications need some sort of a support plan – who handles incoming problem tickets from customers?  Do you have a support process for your end users?  In your own environments and business context, you may have other things that need to be added to this list.  Do you need to check for compliance with some standard or regulation?  What are your policies for using Open Source software?

So this list is not meant to be exhaustive – but it is designed to make you think, and to help you ensure higher quality when deploying your Cloud applications.

Happy Holidays for 2017

With the end of the year quickly approaching, it is a great time to look back on the past year, and to look forward in anticipation for what is coming in 2018.

2017 was an interesting year.  I saw an explosion in the development of chatbots of various different types.  Some were very simple, others used both Watson Conversation and the Watson Discovery service to provide a deeper user experience – with an ability to answer both short tail and long tail questions.  I saw a huge uptick in interest in basic Cloud approaches, and a lot of interest in containers and Kubernetes.  I expect that both of these trends will continue into 2018.

In 2018 I expect to see the IBM Cloud mature and expand in it’s ability to quickly provide development, test and production computing environments for our customers.  I also expect that more people will become interested in hybrid cloud approaches, and will want to understand some best practices for managing these complex environments.  I am also excited about some of the excellent cognitive projects that I have seen which could soon be in production for our customers.  I also expect that some of our more advanced customers will be looking at how cognitive technologies can be incorporated into their current DevOps processes, and how these processes can be expanded into the cloud.

I hope that your 2017 was a good one, and I hope that you have a happy and safe holiday season.

Hurray for IBM Cloud!! Um, where did my stuff go?

Just went through an issue with a customer, and it’s a somewhat common issue so I figured that I would do a quick blog post on it.

Recently IBM has decided to rebrand our cloud from what we commonly refer to as Bluemix, and we are now referring to as the IBM Cloud.  You may have noticed the changes to the UI, and some new capability (like resource groups!).

Some of these changes have caused some of our customers to “lose” access to some of their data on Bluemix the IBM Cloud (see, even we struggle with the changes in names).  These customers claim that they can not see some of the organizations, spaces and services that they used to have.  DON’T PANIC!.  Your work has not been lost.  What has happened is that as IBM has collapsed things to a single IBM Cloud user (when maybe you used to have a SoftLayer user, and a Bluemix user), you now have access to two different accounts from your IBM Cloud web interface.

Fixing the Issue

So just go and look at your profile in the IBM Cloud UI.  It is the little person icon in the upper right hand corner of your browser.

Now click on the little symbol under Account, and you will notice that you now have access to two different accounts.  Some of your artifacts will be in one account, and others will be in the second account.  You can switch context here in the UI so you can see what is in each account.  Presto!!!  Mystery solved, and now you can go back to being insanely productive working out on the IBM Cloud.

Monitoring Bluemix Usage and Spending

Note: This post is also published on developerWorks, as Monitoring Bluemix usage and spending.  Please refer to that article to catch any updates.

I have been spending the summer working with a number of different Bluemix and Watson customers, and one question seems to come up quite frequently.  It has a lot of variations, but it all boils down to this:

“How much of the Bluemix and Watson services am I using, and how can I monitor this?”

This is pretty simple to do, and you can even automate it yourself.  So it’s worthy of a quick blog post.  First let’s start with the interactive monitoring of your usage.

Checking Bluemix Usage

First you’ll need to log into the Bluemix platform, using your IBM ID.  When the main screen comes up, you’ll see account option up in the upper right of your browser.  Click on “Manage”, and your options will look like this:

If you then select “Billing and Usage”, and then select “Billing”, you will be taken to a screen that will show the current status of your Bluemix subscription (if you have one).  It will show how much you have already consumed, as well as how much of your subscription remains.  It should look similar to this:

You can scroll down through this report to see more details.  You can use this same method and select “Usage” instead of “Billing”, and you can see your current months usage and to see the specific usage on any of the available Bluemix services.  There are other things that you may be interested in as well.  Check out the Bluemix Docs on Viewing your Usage for more information.

Automating the Process

You can also see usage (although not billing) information by using the Bluemix CLI (Command Line Interface).  The two commands that you will be most interested in are “bx billing account-usage” and “bx billing orgs-usage-summary”.  A small GitHub project with a command line tool which will dump your account information (using those commands) is called bmxusagetracking.  Go out there and grab the code – and then modify it to suit your own needs.  The script is simple – it should take no more than 5 minutes to grab it and understand what it is doing and how it is doing it.

I am also looking at creating a Python version of this in the same project area – since I know that some of you would much rather do this in Python – so you can manipulate the returned data and make it more useful.  I invite anyone who wants to contribute to the project and improve it, to do so.